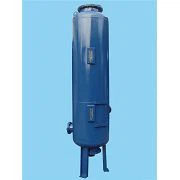
As a reliable SS304 water tank supplier, I understand the importance of installing a heat exchanger in an SS304 water tank correctly. A well - installed heat exchanger can significantly improve the efficiency of the water tank system, whether it is for domestic or industrial use. In this blog, I will guide you through the process of installing a heat exchanger in an SS304 water tank step by step.
1. Understanding the Basics
Before we start the installation process, it's crucial to understand what a heat exchanger does and why it's beneficial to install one in an SS304 water tank. A heat exchanger is a device that transfers heat from one fluid to another without the two fluids coming into direct contact. In the context of a water tank, it can be used to heat or cool the water inside the tank.
SS304 is a popular material for water tanks due to its excellent corrosion resistance, high strength, and hygienic properties. When combined with a heat exchanger, it can create a more efficient and reliable water heating or cooling system.


2. Selecting the Right Heat Exchanger
The first step in the installation process is to select the right heat exchanger for your SS304 water tank. There are several factors to consider:
- Capacity: The heat exchanger should have the capacity to handle the volume of water in your tank. You need to calculate the heat load based on the tank's size, the desired temperature change, and the flow rate of the water.
- Type: There are different types of heat exchangers, such as shell - and - tube, plate, and finned - tube heat exchangers. Each type has its own advantages and disadvantages. For example, shell - and - tube heat exchangers are suitable for high - pressure applications, while plate heat exchangers are more compact and efficient for low - pressure systems.
- Material Compatibility: Make sure the materials of the heat exchanger are compatible with SS304. This will prevent corrosion and ensure the longevity of the system.
3. Preparing the SS304 Water Tank
Before installing the heat exchanger, you need to prepare the SS304 water tank.
- Clean the Tank: Thoroughly clean the inside of the tank to remove any dirt, debris, or contaminants. This will ensure that the heat exchanger works efficiently and prevent any blockages.
- Locate the Installation Points: Determine the best location for installing the heat exchanger. It should be easily accessible for maintenance and repair. You may need to drill holes in the tank if necessary. Make sure to follow the manufacturer's guidelines when drilling holes to avoid damaging the tank.
4. Installing the Heat Exchanger
Once you have selected the right heat exchanger and prepared the tank, it's time to install the heat exchanger.
- Mounting the Heat Exchanger: Use appropriate mounting brackets or supports to secure the heat exchanger to the tank. Make sure it is firmly attached and level.
- Connecting the Pipes: Connect the inlet and outlet pipes of the heat exchanger to the corresponding pipes on the tank. Use high - quality gaskets and fittings to ensure a leak - free connection. You may need to use a pipe wrench or other tools to tighten the connections properly.
- Wiring (if applicable): If the heat exchanger has an electrical component, such as a pump or a control system, make sure to connect the wiring correctly. Follow the electrical wiring diagram provided by the manufacturer.
5. Testing the System
After installing the heat exchanger, it's important to test the system to ensure it is working properly.
- Fill the Tank: Fill the SS304 water tank with water. Check for any leaks around the heat exchanger and the pipe connections.
- Start the Heat Exchanger: Start the heat exchanger and monitor the temperature and pressure of the water. Make sure the heat exchanger is heating or cooling the water as expected.
- Adjust the Settings: If necessary, adjust the settings of the heat exchanger, such as the flow rate or the temperature control, to optimize its performance.
6. Maintenance and Safety Considerations
To ensure the long - term performance of the heat exchanger and the SS304 water tank, regular maintenance is required.
- Clean the Heat Exchanger: Periodically clean the heat exchanger to remove any scale or deposits that may accumulate over time. This will improve its efficiency and prevent damage.
- Inspect the Pipes and Connections: Regularly inspect the pipes and connections for any signs of leaks or damage. Replace any worn - out gaskets or fittings as needed.
- Safety Precautions: Always follow the safety guidelines provided by the manufacturer. Wear appropriate protective gear, such as gloves and safety glasses, when working on the system.
7. Conclusion
Installing a heat exchanger in an SS304 water tank is a complex but rewarding process. By following the steps outlined in this blog, you can ensure a successful installation and a more efficient water heating or cooling system.
As a leading SS304 water tank supplier, we offer a wide range of high - quality SS304 water tanks and related products. If you are interested in purchasing an SS304 water tank or need more information about heat exchanger installation, please feel free to contact us for further discussion and negotiation. We are committed to providing you with the best solutions for your water storage and heating needs.
Here are some related products that you may be interested in:
- Stainless Steel Water Storage Pressure Filter Tank Ellipse Sanitary Water Tank Flange Ferrule Types
- SS304/316L water pressure tank cone santiary water holding vessel
- Stainless Steel Sanitary Water Tank Cone
References
- "Heat Exchanger Design Handbook", by R. K. Shah and D. P. Sekulic
- "Stainless Steel Handbook", by ASM International