Hey there! As a supplier of cone water tanks, I often get asked about how to install a ladder on these tanks for inspection purposes. It's a crucial part of maintaining the tank and ensuring its proper functioning. In this blog, I'll walk you through the steps of installing a ladder on a cone water tank.
Why You Need a Ladder on Your Cone Water Tank
First off, let's talk about why having a ladder on your cone water tank is so important. Regular inspections are key to keeping your tank in top - notch condition. With a ladder, you can easily access different parts of the tank, check for any signs of wear and tear, leaks, or damage. This helps you catch problems early on and avoid costly repairs down the road.
Tools and Materials You'll Need
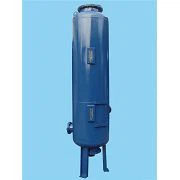
Before you start the installation process, gather all the necessary tools and materials. You'll need a measuring tape to get accurate dimensions, a drill for making holes, bolts and nuts to secure the ladder, a level to make sure the ladder is straight, and of course, the ladder itself. When choosing a ladder, make sure it's made of durable materials that can withstand the elements and the weight of the person climbing it. You might want to consider ladders made of stainless steel, as they're corrosion - resistant. You can check out some great options like the Stainless Steel Water Storage Pressure Filter Tank Ellipse Sanitary Water Tank Flange Ferrule Types, Stainless Steel Water Tank Ellipse, and SS304/316L water pressure tank cone santiary water holding vessel.
Step 1: Plan the Installation
The first step is to plan where you'll install the ladder on the cone water tank. You want to choose a location that's easily accessible and safe. Make sure there are no obstacles in the way that could interfere with climbing the ladder. Use your measuring tape to mark the spots where the ladder will be attached. It's important to measure twice and cut once, so take your time to get the measurements right.
Step 2: Prepare the Tank Surface
Once you've marked the installation spots, you need to prepare the tank surface. Clean the area where the ladder will be attached to remove any dirt, rust, or debris. This will ensure a good connection between the ladder and the tank. You can use a wire brush or a sandpaper to clean the surface.
Step 3: Drill Holes
After the surface is clean, it's time to drill holes for the bolts. Make sure you're using the right size drill bit for the bolts you're using. Drill the holes carefully at the marked spots. Keep the drill straight to ensure the holes are in the right position. It's a good idea to use a level to check the drill as you go.
Step 4: Attach the Ladder
Now comes the fun part - attaching the ladder. Place the ladder against the tank at the marked spots and align the holes in the ladder with the holes you drilled in the tank. Insert the bolts through the holes and secure them with nuts. Tighten the nuts firmly, but don't over - tighten them as this could damage the tank or the ladder.
Step 5: Check for Stability
Once the ladder is attached, check its stability. Shake the ladder gently to see if it's secure. If it wobbles, you may need to tighten the bolts further or check if the holes were drilled correctly. You can also use a level to make sure the ladder is perfectly vertical.
Step 6: Safety Checks
Before you start using the ladder, do a thorough safety check. Make sure all the bolts are tightened, and there are no sharp edges on the ladder that could cause injury. Test the ladder by climbing a few rungs to make sure it can support your weight.

Tips for Maintenance
After the ladder is installed, it's important to maintain it properly. Regularly check the bolts for tightness and replace any that are loose or damaged. Clean the ladder periodically to prevent the buildup of dirt and rust. You can use a mild detergent and a soft cloth to clean the ladder.
Conclusion
Installing a ladder on a cone water tank for inspection is a task that requires careful planning and attention to detail. By following these steps, you can ensure that the ladder is installed safely and securely. Remember, regular inspections are essential for the longevity and proper functioning of your cone water tank.
If you're in the market for a cone water tank or need more information about ladder installation, don't hesitate to reach out. We're here to help you with all your tank - related needs. Whether you're a small business or a large industrial facility, we have the right solutions for you. Contact us to start a conversation about your specific requirements and let's work together to find the best products for you.
References
- General knowledge and experience in cone water tank installation and maintenance.